> For the complete documentation index, see [llms.txt](https://docs.p0.dev/llms.txt). Markdown versions of documentation pages are available by appending `.md` to page URLs; this page is available as [Markdown](https://docs.p0.dev/integrations/resource-integrations/aws/installation-methods.md).
# Setting up AWS IAM management
Install the P0 AWS IAM management integration and choose how P0 provisions and identifies your users — as IAM users, through AWS Identity Center, or through a federated identity provider.
Installing P0 IAM management on AWS takes about 10 minutes. You install the IAM management component on an account, then choose how P0 provisions and identifies your users — the integration's **login type**.
## Before you begin
* Choose at least one account on which to install P0.
* Make sure you can create roles, add trust relationships, and create and assign role polices. You can do this if you have the [IAMFullAccess managed policy](https://docs.aws.amazon.com/aws-managed-policy/latest/reference/IAMFullAccess.html) attached to your user.
## Install the IAM management component
{% hint style="info" %}
For fine-grained Kubernetes access in EKS use the [P0 Kubernetes integration](/integrations/resource-integrations/kubernetes.md).
{% endhint %}
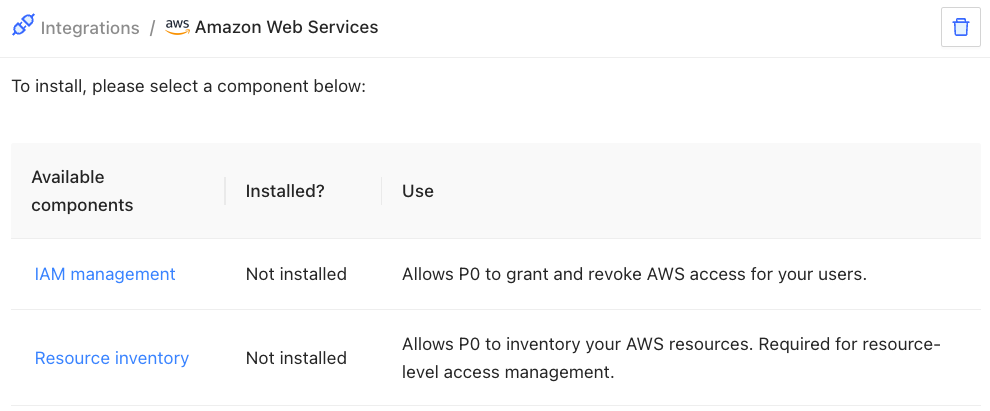
1. Navigate to "Integrations" on [p0.app](https://p0.app), then select "Amazon Web Services". Choose the "IAM management" component:
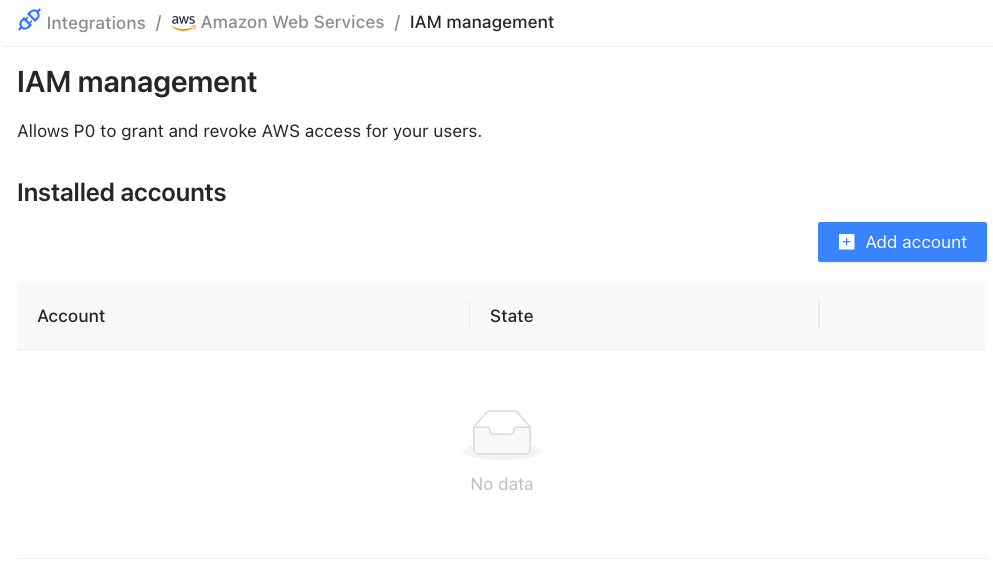
2. Click the "Add account" button to begin the installation
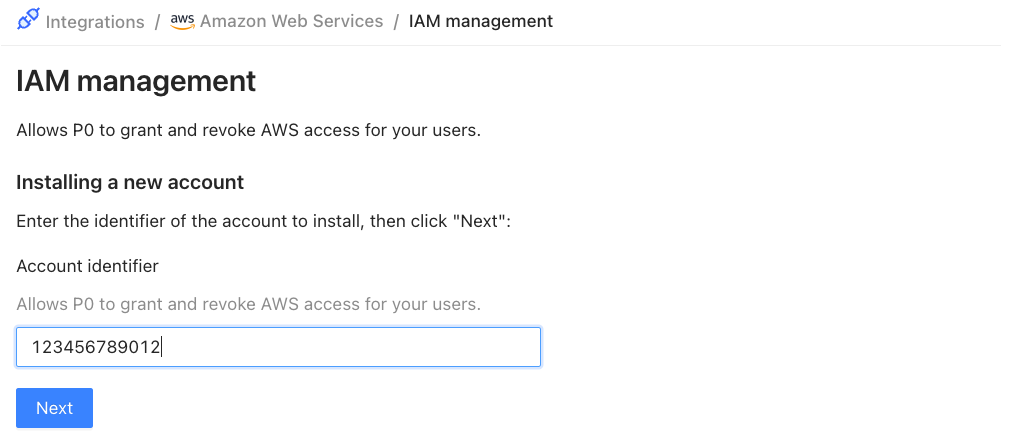
3. Enter an AWS numeric account ID, then click "Next".
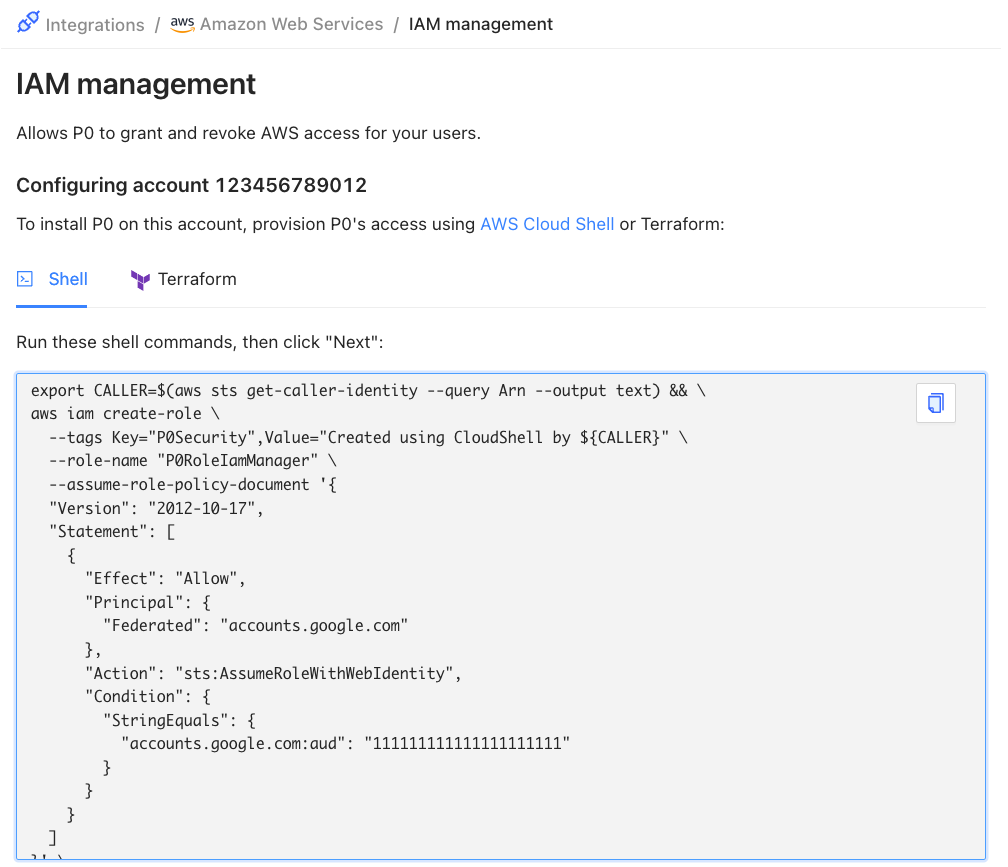
4. The next page displays commands you can run using the AWS CLI to provision P0. You can also run these commands using AWS Cloud Shell.
5. Copy and run these commands or use the Terraform configuration to deploy the changes. Click "Next" to verify the installation. If verification is successful you will be taken to the integration configuration page.
## Troubleshooting
### "The web identity token provided could not be validated"
When you click "Next" to verify the installation, the verification fails with an error like this:
```
Error configuring Amazon Web Services
Failed to verify permissions for account 171433610395: The web identity token provided could not be validated. See the AssumeRoleWithWebIdentity documentation for requirements. (account=171433610395 region=undefined)
```
This happens when the account already has an IAM identity provider for `accounts.google.com` whose audience list doesn't include P0's audience. P0 assumes the `P0RoleIamManager` role by calling `sts:AssumeRoleWithWebIdentity` with a Google-signed token. When a Google identity provider exists, AWS validates the token's audience against that provider's configured audiences, and the assume-role call fails if P0's audience is missing.
To fix this, either remove the existing Google identity provider so AWS validates the token against Google's built-in federation, or add P0's audience to the provider. If other workloads depend on the existing provider, add the audience instead of removing it.
To add P0's audience to the existing Google identity provider:
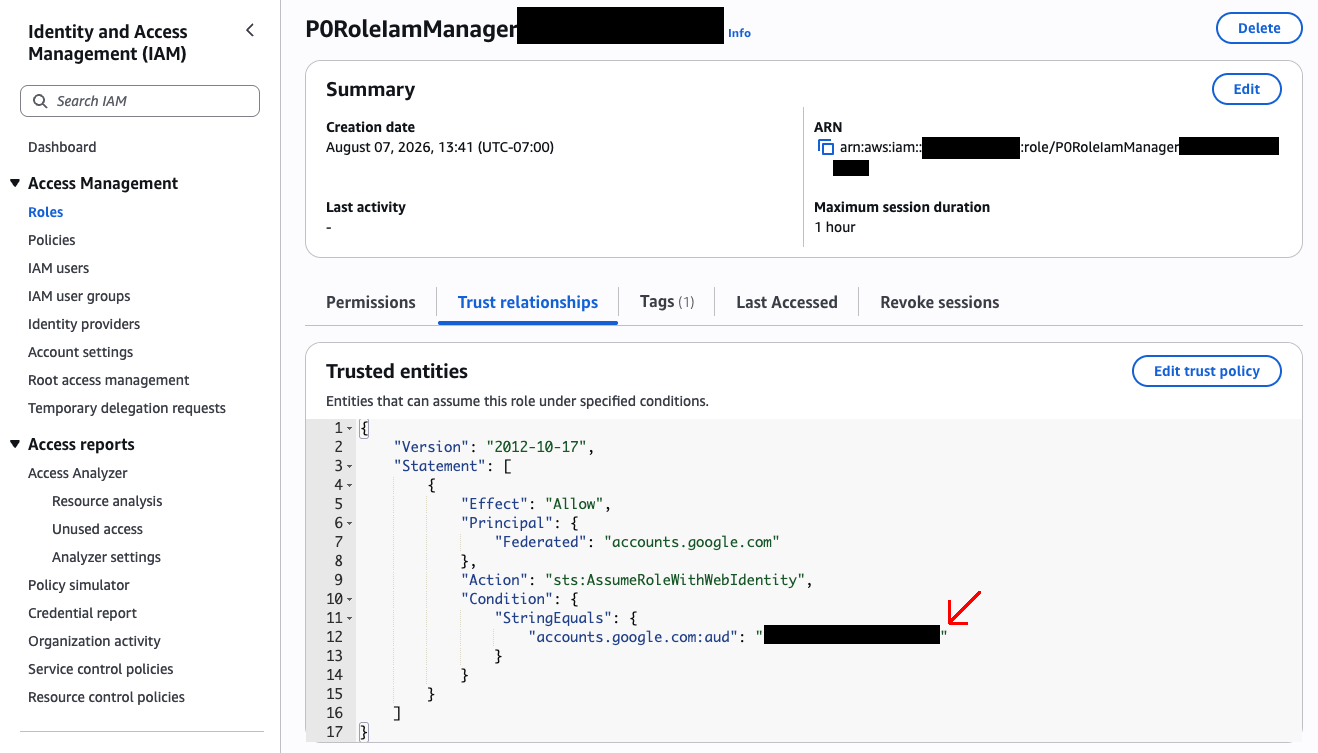
1. In the AWS console, open **IAM** > **Roles** and open the `P0RoleIamManager` role.
2. Select the **Trust relationships** tab and copy the value of the `accounts.google.com:aud` condition. This is P0's audience.
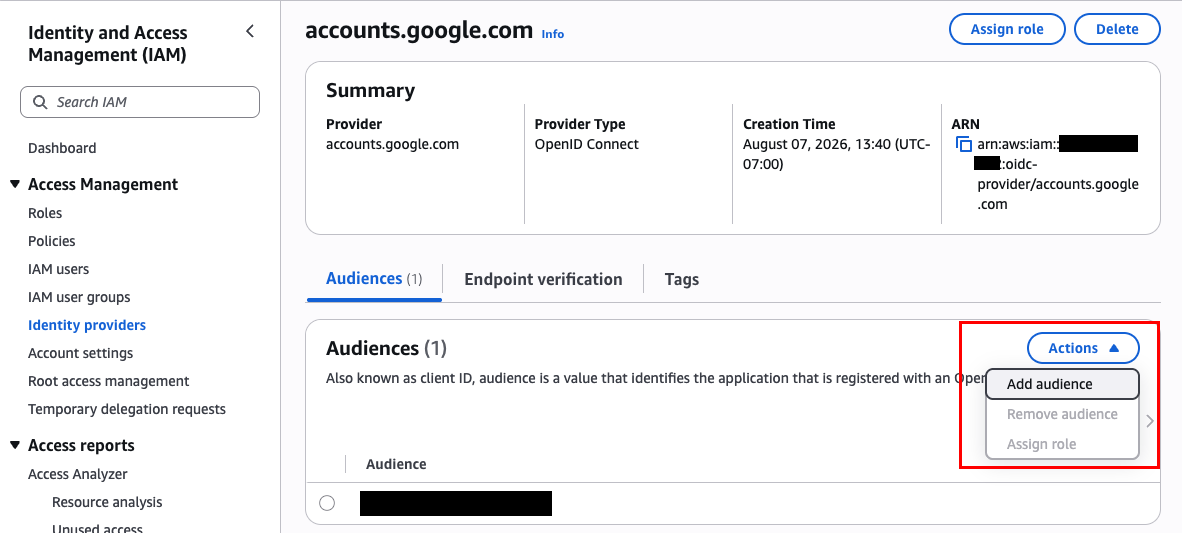
3. Open **IAM** > **Identity providers** and select your `accounts.google.com` provider.
4. On the **Audiences** tab, select **Actions** > **Add audience**, then paste the value you copied and save.
5. Return to the P0 installation and click "Next" to verify again.
### "Unexpected content in P0 identity policy"
Verification fails, or the weekly install-issues email reports an error like this:
```
Failed to verify permissions for account : Unexpected content in P0 identity policy P0RoleIamManagerPolicy.
Either fix these policy differences or rerun this account's setup commands.
Differences:
{
"Statement": [
"",
{
"Action": [
"",
{
"-": "ec2:DescribeInstances"
},
""
]
}
]
}
```
This means the `P0RoleIamManagerPolicy` inline policy deployed in your account no longer matches the policy P0 expects. P0 adds permissions to this policy as it gains capabilities, so an account installed some time ago drifts from the current policy. Editing the policy by hand causes the same result.
Read the `Differences` block as expected-versus-deployed:
| Marker | Meaning |
| --------------------- | ------------------------------------------------------------------ |
| `{ "-": "" }` | P0 expects this action, but your deployed policy doesn't grant it. |
| `{ "+": "" }` | Your deployed policy grants this action, but P0 doesn't expect it. |
| `""` | The entry matches; it's collapsed to keep the output short. |
To fix the drift, redeploy the current policy for that account:
1. In P0, open **Integrations → Amazon Web Services** and select the **IAM management** component.
2. Select the account the error names to display its install commands.
3. Reapply the policy:
* **AWS CLI:** run only the `aws iam put-role-policy` command. It replaces the inline policy in place. Don't run the whole block — the commands are chained with `&&`, and `create-role` fails with `EntityAlreadyExists` on a role that exists, which stops `put-role-policy` from running.
* **Terraform:** run `terraform apply`. The configuration reconciles the policy for you.
4. Click **Next** to verify.
Until you redeploy, P0 keeps the account installed but the alert repeats weekly, and any capability that depends on a missing permission fails.
## Choose a login type
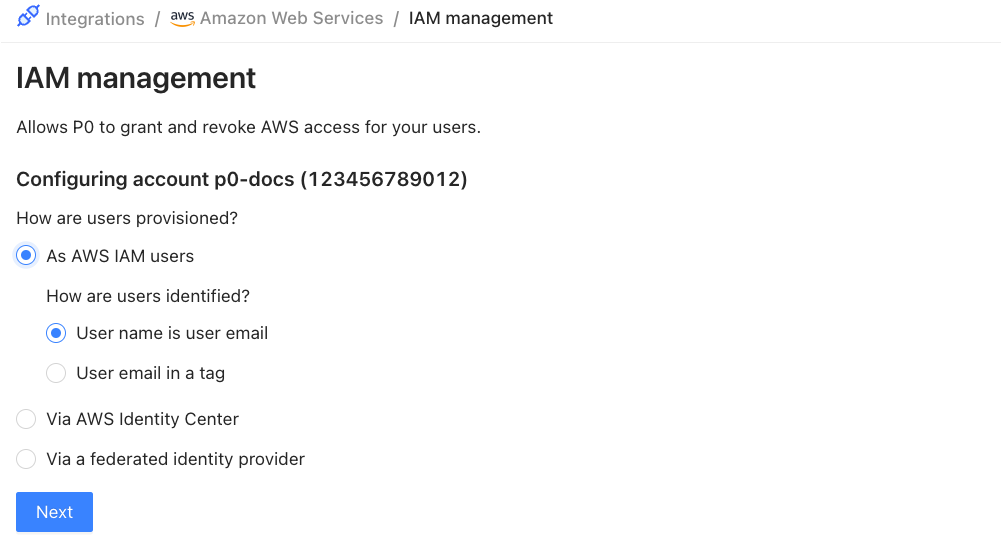
On the configuration page, you define how P0 provisions and identifies your users in AWS. This choice is the integration's login type:
| Login type | How P0 identifies and provisions users | Best for |
| -------------------------------------------------------------------------------------------------- | ---------------------------------------------------------------------------------------- | ------------------------------------------------------------------ |
| [IAM](/integrations/resource-integrations/aws/installation-methods/iam.md) | Matches users to IAM users in the account, by user name or by a tag. | Accounts whose users are defined directly in IAM. |
| [Identity Center](/integrations/resource-integrations/aws/installation-methods/identity-center.md) | Matches users to AWS Identity Center identities and grants a per-request permission set. | Organizations that provision access through AWS Identity Center. |
| [Federated](/integrations/resource-integrations/aws/installation-methods/federated.md) | Matches users through an Okta SAML federation and grants IAM roles. | Accounts that sign in through an Okta federated identity provider. |
Federated is a legacy sign-in method — AWS recommends Identity Center for new deployments.
The access types each login type supports differ:
| Access type | IAM | Identity Center | Federated |
| ---------------- | :-: | :-------------: | :-------: |
| `group` | ✅ | | |
| `permission-set` | | ✅ | |
| `policy` | ✅ | ✅ | |
| `resource` | ✅ | ✅ | ✅ |
| `role` | | | ✅ |
{% hint style="info" %}
To avoid Identity Center permission-set sprawl, you can provision access through a single shared permission set with the [Identity Center (merged)](/integrations/resource-integrations/aws/identity-center-merged.md) method. That method is in beta and requires a separately installed AWS Identity Center (merged) integration.
{% endhint %}
## Next steps
* [Set up AWS resource inventory](/integrations/resource-integrations/aws.md#setting-up-aws-resource-inventory) to request fine-grained, resource-level access.
* [Request AWS access](/integrations/resource-integrations/aws/requesting-access.md).